Monday, February 15, 2021

The Canadian 

How I got back into the hobby...

I had a model train layout when I was a kid.

I had a model train layout when I was in law school.

Through the years I kept my subscription to Model Railroader and Trains and stayed interested in the hobby.

One of the moments that hooked me on the hobby was seeing old pictures of the CPR's Canadian passenger train from the '50s. The Canadian is most famous for its dome cars designed to maximize scenery viewing. I rode Via's version of the Canadian several times (last in 2016) and it is one of those things in life that NEVER disappoints. How many things in life are as good today as they were 60 years ago?

Robert J. Sandusky photo.

But owning an HO scale model of the train, or should I say, an accurate model of the train seemed like an impossible dream. A sidebar here - in the glory days of passenger trains, railroads would often order custom equipment. It isn't like today, where an Air Canada A330 looks pretty much like every other A330 except for the paint. The Canadian cars were unique (and, at $40 million in 1955 dollars, a terrible investment considering the downward spiral passenger trains had entered). 

Shoreham Shops offered the train in Brass in the early '90s, but at $300 per car (for a 10 car train) and no prototype F units, that didn't bring the dream any closer.

...and then, in 2008, a Company called Rapido Trains - Rapido trains - announced that they would be offering a 10-car set, with prototype FP9A and F9B units for a decent price. Talking about Rapido is a whole other post in of itself. The company, which grew from very humble beginnings, has endlessly delighted Canadian model railroaders for years by introducing Canadian prototypes that modellers never dreamed of seeing (in plastic, at least). Steam engines. Rolling Stock. Special trains (the Tempo, the LRC). Diesel engines (my RS-18 fleet, FPA-2's, F units, etc. etc. etc.). All highly detailed (they actually put a toilet in one of their models - clarifying that it was non-operable). There is now a company that makes it possible to accurately model your favourite Canadian railroad during the time and place you wish. And they are genuine and fun (their YouTube product videos are worth a watch - for example, Display case.)

I placed my order. And waited. And waited. And waited so more. And then, one day in 2011, my set arrived. It was perfect.

A Chateau series sleeper.

Deluxe Coach


Only one problem. To display, even part of the set, would require 8 feet of wall space and I'd have to find display case to keep off dust.

This required some serious thinkin' because I'd have to create a display case from scratch.

I started with Ikea photo shelves. I added some track. There was no way I was going to leave the track bare, so I ballasted it and put it on foam roadbed. That meant trips to the hobby store.


I added Ikea strip lights.


Skyline Dome car

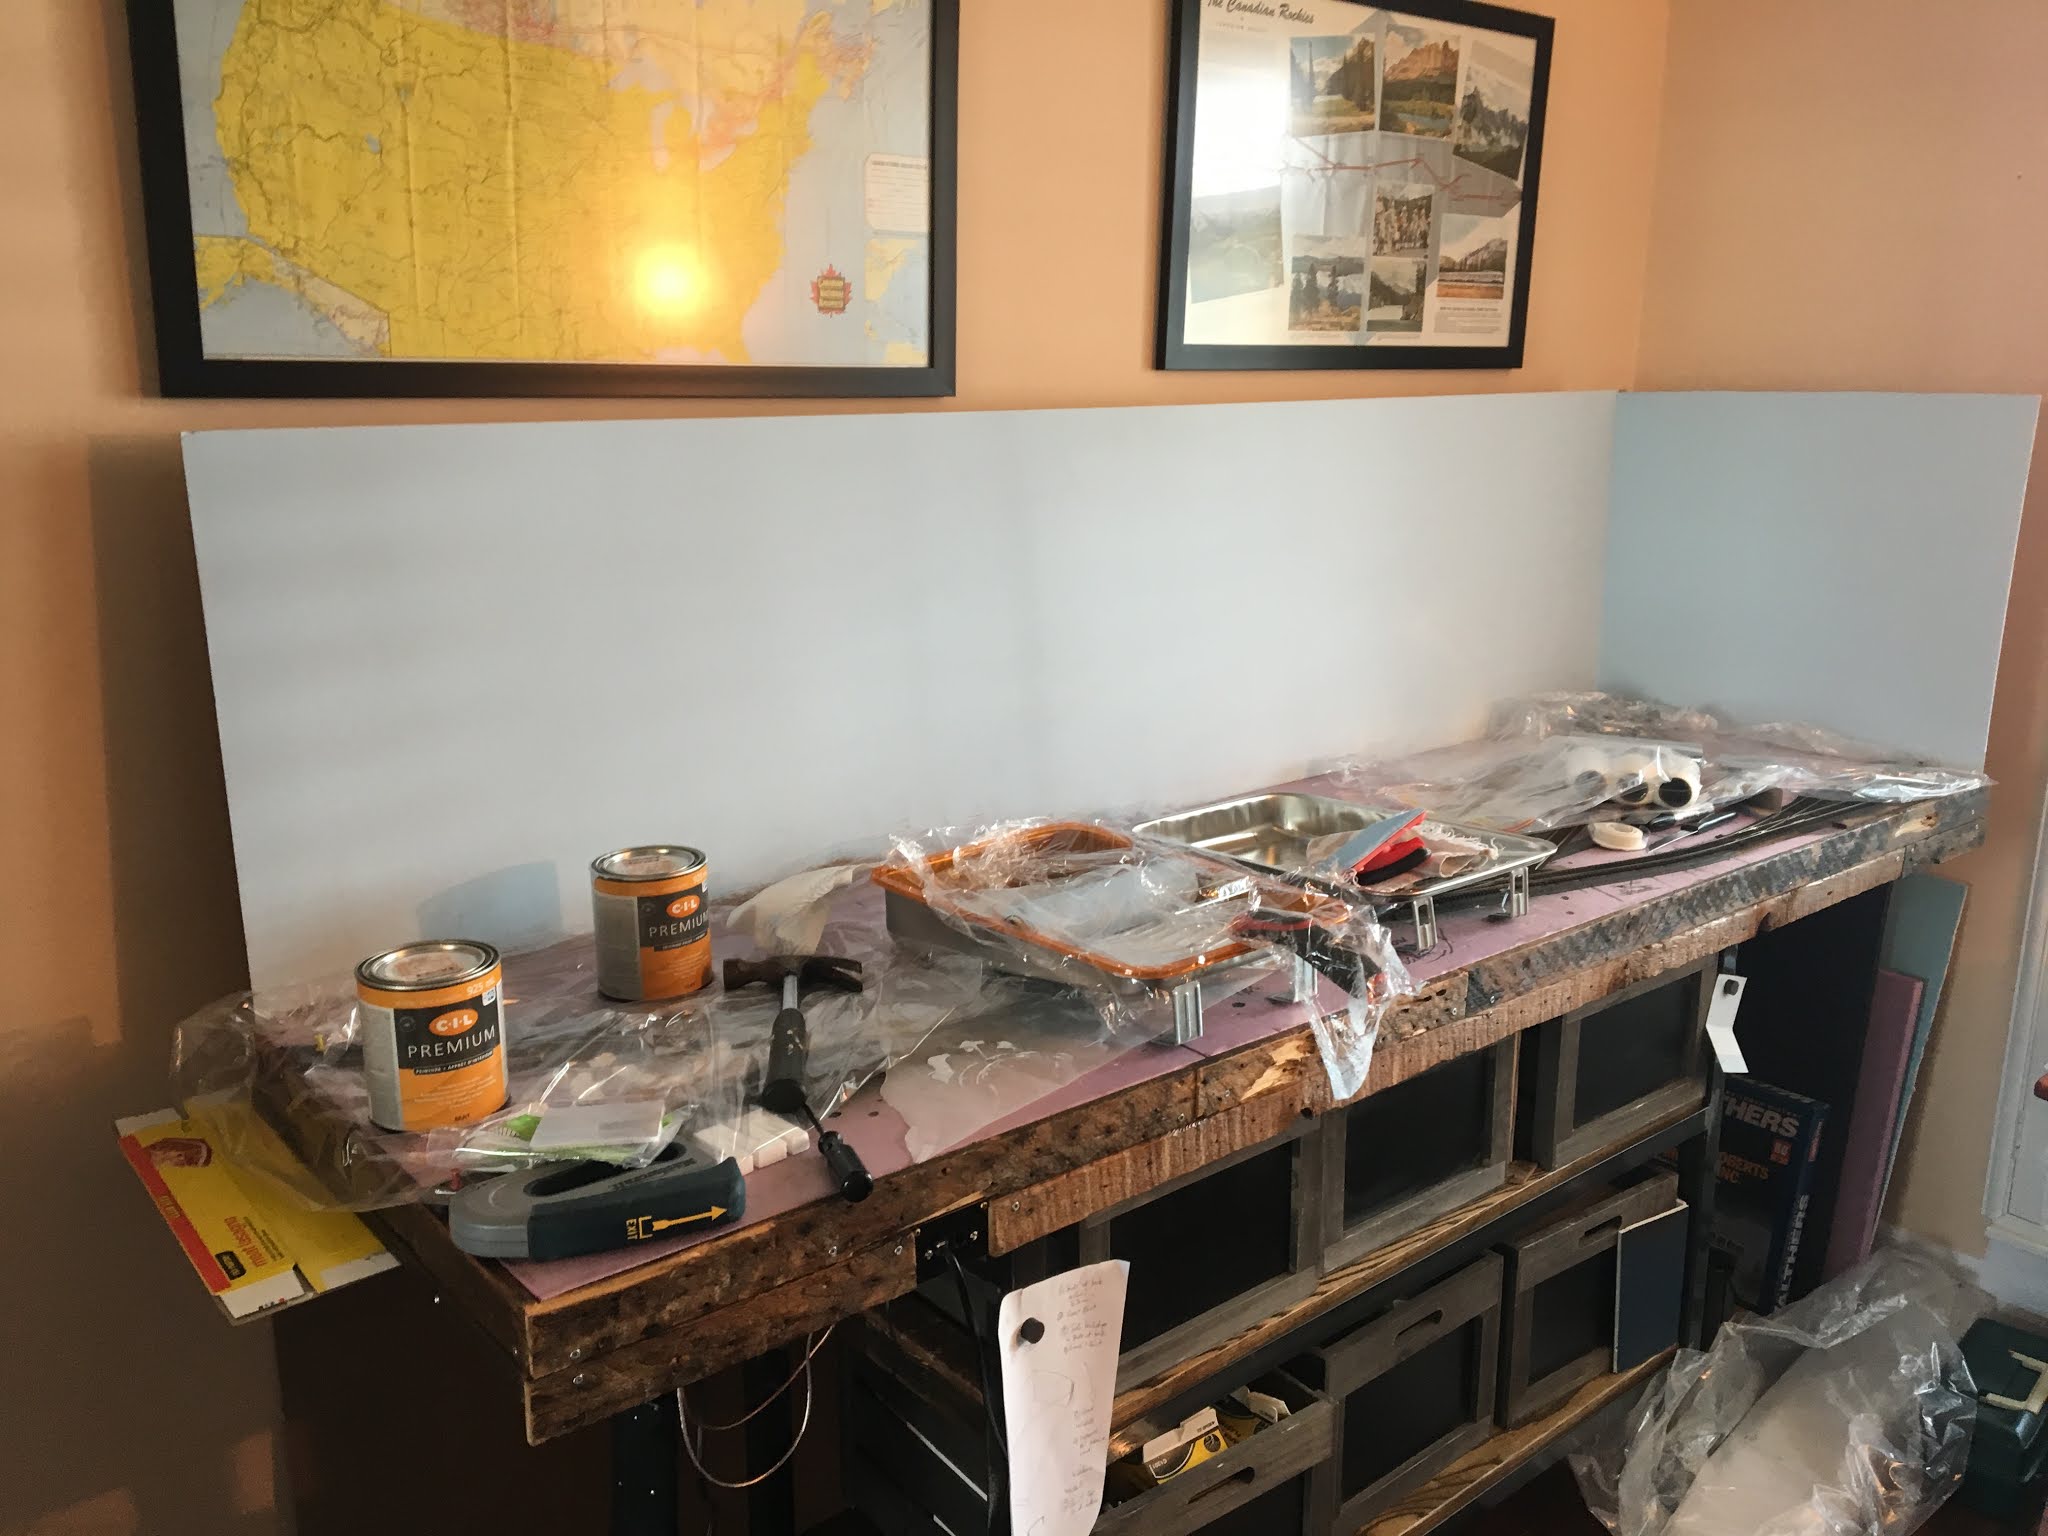
That wasn't good enough, so I added a blue foamboard backdrop (not perfect but it still works) because the peach coloured walls weren't doing it for me. To keep the dust off, I had clear acrylic side panels custom made and attached them to the Ikea shelves with velcro. They have never come off, and the train remains in its tomb. I do have two spare cars and a spare F unit in storage.

F-units


Pocket Streamliner on the layout.

Park Observation car.


Needless to say, the entire project (which took months) was extremely satisfying. I loved the problem solving. I loved the look of the track. I loved the visuals in my brain of what a perfect diorama would look like.

Which led to...the Aston Spur. 

Sunday, February 7, 2021

 Adding a road to the Blob

One of the most amusing (or interesting) aspects of the "train hobby" is the number of disciplines and skills it can encompass. In building the basic layout, some knowledge of carpentry and electrical work is necessary. Track laying requires patience, a good saw and the ability to transfer measurements from a drawing to real life.

Aside from technical skills, the blob involved another skill - scene composition. Basic model railroad scenery theory states that the trains/track should fade/blend into the scenery. And in real life, trains are rarely the focus. So other things are just as important. Like roads.

The road

The geography of the road is that it links the (unseen) town of Aston with the station and Aston Growers. 

A basic rule of model train scene composition is to avoid having major scenic elements be either perpendicular or 90 degrees to the layout edge (either the front or the back). You want angles. 

Another concept is to not draw attention to places where you "cheat" to fool the eye. 

Finally, scenery should make sense - that is, if there is a bend in a road, you should include the thing that is the reason for the bend (a rock, a river, etc.).

Enough road/scenery theory.

To build the road, I first glued cardboard to the insulation foam to give myself a guide for the width of the road. I then cut small pieces of balsa wood to form the edges of the road. Then, I poured Woodland scenics "Smooth-it" plaster into the balsa wood form, smoothing the top with a crepe maker tool. The balsa wood acts as a guide for the crepe maker, ensuring the plaster is level. Still, there are inevitable dips and bumps and lots of sanding and some repaving is required.

I painted the plaster with "asphalt" paint and then used weathering chalks to tone down the paint. I didn't paint lines on the road because I didn't want to draw attention to the fact the road's width is not uniform. My theory is that this is not a major thoroughfare. I added some medium rock ballast on the side of the road and some posts (painted wood skewers) to keep motorists on the road. 

The posts took forever to make (there about 30 of them - chop, paint, paint again, drill, insert). But the details make the difference.

I feel like a dirt shoulder would have been better for the road. Over time, I've come to the gravel as too clean/white - such that it draws attention.

Road elements

What makes the road interesting?

1. The bridge.


The footing/base for the bridge can be seen.

Ready for installation.


In situ.

The bridge (a Rix products kit) was easy to assemble. The railings reminded me of the bridges in Glen Williams, where I grew up. I rusted the railings with burnt sienna paint and added (too much) grime on the surface.

As with many things on the layout, the challenge with the bridge is that it had to fit in with future projects - in this case, scenery blob #1 (the large blob at the back against the backdrop) and scenery blob #2 (in the foreground in the first picture). Here the pink insulation foam helped because you can make a precise cut in the foam for the bridge to fit in. 

I measured the fit countless time - both to bridge the blobs together and to ensure the clearance over the track was adequate.

Blob #2.


2. The curve.

The almost 90 degree curve vehicles encounter isn't very prototypical. In the 60's, with standard tractor trailer lengths being 28' to 34' (feet), I could see it being possible.

But here again, the art of distraction comes into play:

Hi visibility railings added by Aston county

Hiding the road.

I scratchbuild slightly over size warning railings to draw the eye and serve as an apology from the Aston county public works department for the sharp curve.

Here again the 3-D backdrop helps - the rock outcropping justifies the sharp curve.

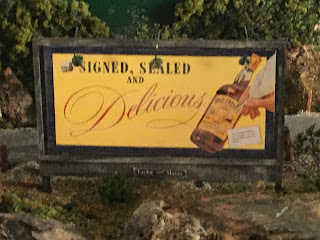
3. The billboard.

Beauty.

So:

1. I'm a lawyer - signed, sealed and delivered being a common (albeit archaic) phrase used in contracts.
2. I kept on humming the Dave Dudley tune "Six Days on the Road" in my head as I built the billboard.
3. I work in the transport business (and for a trucking company in the past) so I thought this would be an ad that appealed to that demographic. Bottles of scotch being a very common "thank you for your business" present to traffic managers back in the day.

The billboard is an easy-to-assemble kit (it took about 2-3 hours) from Blair Line. I painted and weathered it before installing it. The billboard illustrates many of the things that make the hobby rewarding. First of all, the MR industry has plenty of small Mom and Pop suppliers who make great kits just a click away. Second, the effort/reward here is considerable - the billboard adds a lot of visual interest and it only took a short time to build. And I like the colour (muted yellow) as it goes well with the warning railings. Three, the billboard, in a small way, takes you out of 2021 Toronto as you look at it, back to the 50's and 60's.

4. The disappearing act. 

As I mentioned at the top, a golden rule of scenery is to avoid 90 degree meets between foreground scenery (i.e. a road) and the backdrop. Of the oldest tricks in the MR book (literally - I saw this in a scenery book from the 1950's) is to have the road crest right before it hits the backdrop so the eye can't see the meet. The dip also avoided the problem having the road plaster mess up my picture backdrop. The road actually stops about 1/8 away from the backdrop.

Narrowing the road also gives the illusion of distance.

And I added a curve.

If I really wanted to be cool, I would have added N-scale guardrails (a smaller MR gauge than HO) to create "forced" perspective - that is changing size to fool the eye into believing something is further away than it actually is.


The finished scene.

The narrowing is very apparent.

In a future installment, we'll see where the road comes out. But next, I think we'll take a brief side trip.


Sunday, January 31, 2021

 The first scenery blob (part I)

Wither Blob?

With track and a backdrop in place, the next step was to model scenery (this was around April 2019). I wanted a ridge with a road in the back for visual interest sake since the track was dead level. I also wanted some Canadian shield rock. One of my favourite train pictures (from Signatures in Steel) is of the Super Continental passing through a rock cut in cottage country. And when my Brother, Uncle and I go fishing every summer, I spend many peaceful hours staring at rocks. So rocks.

The blob, mostly done.


I can be very Type A. This trait is not helpful when it comes to making progress because the fear of failure causes inaction. Pretty sad when we're discussing a hobby that is supposed to be relaxing.

And again, I hadn't modelled for 20 years and was starting all over again.

So how to avoid making a permanent mistake? Another complication is that with the backdrop in place, I didn't want it getting covered in plaster.

So...

I built the blob on foamboard. Foamboard is easy to cut, sturdy and lightweight. It does warp over time but this wasn't an issue because it was going to be glued in place. The blob guts are insulation foam - again, easy to cut (with the hotwire tool), lightweight and plays nicely with plaster.

For rocks I tried making castings for the first time with plaster and rubber molds. This was one of the most rewarding moments - taking the rock out of the mold and seeing the texture and detail. Colouring the rock with various tints was also very enjoyable. Although I tend to like my rocks grimy rather than the pure grey we think of when we hear "rock". As I've mentioned before, I'm not an artistic person. But the end result looked great and it was easy. Woodland scenics (and YouTube) make it dead simple.

Rather than blather about the process, I'll share pictures:

Fitting rock castings

Coloured rock castings - love the detail.

Rock castings set in place with plaster.


My train room is a little dark. Because the blob was mobile, I could paint the rocks on my kitchen island (in natural light). You may also note the aluminum oven tray used to keep things tidy. 

I put a road in (which I discuss in Part II). Once that was in place, I added scenery. The usual stuff - ground foam, dirt, foliage clumps, cotton puff shrubs, Heki static grass and some bramble. I also had to ensure that I cut out room for a bridge before setting the blob in place.

The next challenge was to blend the blob with the backdrop. I wanted to add additional height and give the road a reason for its sharp curve. 

One suggestion I had seen for backdrop transitions was to use green scouring pads to add a distant tree line. I experimented with it and the result was meh. Instead, I went back to the foamboard and build vertical scenery on it with the intention of gluing it to the backdrop. As with the main blob, this method enabled me to make mistakes away from the layout. It was also easier to attach rock molds and to create a textured tree line from foliage foam with a mobile blob. 

The method was - 1. Spraypaint the foamboard green. 2. Add castings 3. Cover the rest with foliage (including the top and sides of the foamboard). The result was a 3D blob that fit between the road and the backdrop.

Backdrop blob:

Building the backdrop blob. Note the foliage "framing"

Shrubs for the backdrop blob.

The backdrop blob in inaction. Look at those lovely True Line boxcars!

It isn't clear from my photos how long this took, but I think the blob was built between April and November 2019. I was learning and problem solving along the way, and the slow pace worked in creating an end result I was (and am) happy with.

In the next post, I'll write about adding the road, bridge and further details to the blob.


Sunday, January 24, 2021

A Backdrop for the Aston Spur

With the layout resting on top of the cart, it was now time to add a backdrop. By this point it was April 2019.

Now, I didn't take very good notes in the early days of building the layout. But I believe I went with High Density Fibreboard for the backdrop. I wanted wood that would not warp and could stand up with little support. 

I opted for a free-standing backdrop. I could have mounted it against the wall but that would have kept the layout stationary. What's the point in buying a cart with wheels for a stationary layout?

I secured the HDF to the layout with 1 x 2 studs. The studs were screwed into the layout base (on the studs used to frame the plywood). I then glued the HDF to the studs with clamps. For a few weeks, my clamps were my favourite tool.

I compromised and had the backdrop on the "north" side (the side against the wall) and the "east" side (the industrial end) meet at a 90 degree angle. With the light blue paint, the meet doesn't stick out. I did not have the space to curve the backdrop.

The challenging bits were keeping the HDF level and flush with the layout. Joining the back and side sections was also a challenge. As you can see from the photo below, I did get some warping at the back but it is not noticeable at the front. A pleasant bonus was fitting the side backdrop between the foam and the side trim giving it a strong base.

For paint, I went with CIL "Clear blue sky" flat matte. An unremarkable colour. I didn't paint clouds on the sky (perhaps a future project). I can't remember if I primed the HDF first or sealed it. What I do remember is that the paint rolled on remarkably smoothly and the finish was perfect.

A few pictures:

Making a mess. I don't remember what the staple gun was for.

A close up of the corner.

The studs. Note the warp.

One last note - I intend to add a partial roof to the layout. The purpose of the roof is allow me to add overhead lighting (likely from Ikea). The lack of light is a problem in the area behind Aston storage and Generic Canneries - the area is scenicked but with no light you cannot tell. I hope that the studs will help support the roof, but as you can see from the warp in the photo, this is probably wishful thinking. 

Painted and photo background

Much like the rug in the Big Lebowski, a subtle background ties a scene together. 

I went with both a painted background and a (purchased) picture background for the spur. If I was doing it again, I'd go with a picture background for the entire layout. At the time, I had read that picture background had a tendency to "bubble up" from a HDF backdrop and I was intimidated. There was also some confusion about what kind of adhesive to use - spray adhesive? Photo adhesive? I went with Heavy Duty Contact Cement from LePage. It stinks (smell-wise) but I've found it to be about 90% effective. The key is to use a lot of glue. A lot. And spread it with a brush. I flattened the photo against the backdrop with a crepe spreader (a very useful tool). There is a small section of the layout where the print has come loose but it is not noticeable. 

Anyway, the lesson for me from all of this is to just have faith. This was my first time playing with a photo background and the results were nearly perfect. 

The Painted background

Meh.


I spraybombed the backdrop with dark green paint to create a distant hills look. As you can see, not very pretty. And the sheen shows up in photos (I discuss building the hills in a separate post).

The painted section covers about 3 feet.

The Photo section


Much better! The tree in the upper left hides the painted/photo transition.

I purchased my backgrounds from railroad backdrops. They weren't cheap and took a while to deliver, but I'm happy with the end result.

A few other notes about using photo backgrounds:

1. Obviously, the right time to apply the photo background is before adding scenery.

2. I cut out the sky from the backgrounds and used paper hole punchers to round the photo edge. I ran black or green paint over the top of photo to blend it in.

3. You do end up "wasting" a fair bit of the background if you put high scenery in front of it (hills, for example). I accepted the waste in favour of keeping the background level. In one place (behind Aston Growers), however, I added an additional photo blob to prevent the structure from being framed by the blue sky. I should have done this with Generic Canning.

4. At the 90 degree corner, the two background colours do not match. You see it in the photo below:


I still love this picture though. And it is before Generic Canning was placed so the clash is not as noticeable now.

The point of all of this is to say that I'm really happy with how everything turned out. It isn't perfect but I'm amazed at how it turned out for a first try. My only real regret is that I didn't have enough confidence to try a photo background at the outset.


Monday, January 18, 2021

 In the news...


Ruh-Roh!

From the June 17, 1964 edition of the Aston County Recorder:

    "A local CPR freight train hit a van that wandered onto the tracks 
    yesterday near Aston. The occupants of the van, 2 men, 2 women 
    and a large Great Dane were shaken but otherwise unhurt. The driver 
    of the van, Norville "Shaggy" Rogers, claimed, "the gang, was like 
    checking out the spooky old building [Generic Canneries], when like this
    ghost got in the train and started driving toward us!."

    Police may have another explanation. A small quantity of biscuits were 
    found in the van and have been sent to the crime lab for testing. Toxicology
    results for Mr. Rogers are also pending.

    A spokesperson for Generic Canneries, Malcroft Withers emphasized that the        building is a going concern and that trespassing charges may be filed                   against Mr. Rogers and the rest of the gang. Mr. Withers said, "Generic 
    Canneries has enough troubles without a bunch of no good kids nosing                around." 


Sunday, January 17, 2021

 A cart for the Aston Spur

In the early days, the plywood/foam base sat on two folding tv dinner tables.

Not ideal.

Note the folding tables.


I live near the Junction in West Toronto. The Junction got its name as the meeting place for the CPR's North Toronto line (with a line down to Union Station and the beginning of its Transcon line North) and CN's Weston Sub. The area is still very active with trains - CPR's Lambton yard and the Weston Sub's stream of GO Trains, UP Express trains and Via.

Dundas St. W. in the Junction area has lots of little shops. At the time, I was buying furniture from Forever Interiors: https://www.foreverinteriors.com/. They make furniture from steel and old re-finished wood. Their work is gorgeous (although they've moved locations since).

I got to know the owner and asked him to custom build a train cart for me. The cart does the following:

1. Acts as a solid base for the layout.
2. Gave me additional storage space.
3. Helps the layout "blend" into the room.
4. Has wheels to enable me to move the layout around a bit.

It cost about $1000, which was a bargain. The steel/wood combo gives it a rustic industrial look.

Note the trim.


I found six crates at Home Depot to store scenery materials and rolling stock underneath the layout. I later bought a rolling cart from Staples for additional storage space (the green cart below).


As an added touch, I bought some old barn board from Forever Interiors to use as trim for the layout. The trim disguised the plywood/foam base. I recessed my DCC panel in the trim. You can see trim installation in progress in one of the photos above. Here the studs I had previously installed came in handy as they supported the screws for the trim. I sealed the barnboard to eliminate splinters and protect some of the damaged parts of the wood.

There is just enough clearance between the trim and the boxes to enable them to be removed easily.

The cart may not sound like a big deal, but when you live in a small condo every inch of space helps. I also don't like a cluttered look and a 2x7 blob in a small (9 x 10) room can take over very quickly. 

The cart was a very satisfying part of creating the layout. It looks great. It saves space. The specs worked out perfectly - who knew I would find boxes that fit the shelves perfectly. And the barnboard trim was a beautiful finish. And I supported a local business.

One last touch is the art above the layout. My Stepfather (a bit of a pack rat) gave me two very appropriate pieces of vintage railroad publicity that were in amazing shape despite being over 60 years old. I had them framed and they live above the layout. 

1955 CN System Map

A 1955 brochure for the Canadian

The cart arrived in September 2018. By this point, I had finished the track and installed DCC. I was now ready for scenery!


Sunday, January 10, 2021

Building the Aston Spur

I imagine the construction of every model railroad begins with a trip to Home Depot. In my case, I went to buy plywood and 1 inch thick home insulation foam blocks (each block being 2 feet square).

Early Days on the spur.


I used foam to deaden the sound of the track and because I had read about using foam as a scenery base. I think the idea of foam as a scenery base originated from an article in MR circa 1993 by one of the hobby's demigods - Bill Darnaby. The only downside to the foam, which many people have discovered, is that certain kinds of spray paint eat it up. I discovered this when spray painting track.

I trimmed the plywood with 1 x 2 studs which came in handy later.

The track 


Two the things that annoyed me about my layouts I had built growing up was how ugly Code 100 Peco track was and how sharp #4 turnouts looked. By "sharp" I mean unrealistically sharp, not sharp as in "handsome".

My first experiment with Code 83 was in building a display case for my Rapido Canadian (a subject for a future post). I had bought Code 83 Micro Engineering pre-weathered flex track for that project and had some left over. I read somewhere that the weathered track did not bend well so I used unweathered track for most of the Aston spur.

For turnouts, I went back to Peco, which has a line of Code 83 #6 and #5 turnouts. I think I went with them because I intended to use DCC and understood that I wouldn't have to solder extra wires (I have no f***ing clue how to solder) to make the turnouts work.


I don't use switch machines on the spur which eliminated a layer of complexity.

I did use cork and foam roadbed, with the track nailed in place. In recent years, the trend seems to be to glue track in place, but I wanted the flexibility to get things wrong. It is very hard to unglue track. One of the annoying bits about the construction method I used is that I had to assemble the cork like a jigsaw puzzle to fit the track plan.

Piecing together the cork.


Have I mentioned yet how much I hate rail joiners? One of the worst parts of trackwork, especially using Code 83 joiners which are impossible to open. I ended up using Code 100 joiners which were only slightly easier. 

Powering it (or OMFG x 2)


Please understand, dear Reader, that I am an Arts Major with a Law degree. I have nearly zero trade skills - such as electrical or carpentry, for example. Computers intimidate me. And I hate reading manuals. 

Going into building the layout, I had two major handicaps:

1. I didn't know how to solder.
2. I didn't know anything about installing DCC. And DCC sounded like something complicated.

Now soldering is not something you want to screw up. There are few MR things worse than a wire coming lose on your layout that you need to re-solder in situ around ballast and scenery (unless you intend to model a small brush fire). Amongst the train gear I had growing up with a box of small bits of track with leads pre-soldered to them. So recalling that, I came across pre-soldering track joiners from Atlas which I used in three locations on the layout.

Problem #1 solved. Onto Problem #2.

Once I decided to use DCC, I know needed to figure out how to wire the layout. Here again, (as with Bill Darnaby) my MR subscription came to the rescue. The December 2016 issue revealed that instead of soldering, one can use "suitcase" connectors to join feeder wires to the bus wire. Where does one find suitcase connectors? Amazon? Home Depot? Car part shops?

The answer was my local train hobby shop - Credit Valley Railway (CVR). 

Thank you Model Railroader!

Not only did I find suitcase connectors at the CVR, but they also explained how to use them and what wiring to use (speaker wire).

As an aside (and this is more for my amusement), I should note that one could really go down the rabbit hole in following the suitcase connector vs soldering debate. Consensus is lacking. If I can summarize it - suitcase connectors may not be reliable long-term and tend to bleed power, whereas soldering connections is more reliable. 

But for me, suitcase connectors meant I could wire the layout in an afternoon. Hot damn!

Next was to find a solid base for the Aston Spur.