A Pond for Aston (Part II)
With the pond bottom in place but a very chalky white, I then set about to paint it.

Unfortunately for the blog, I didn't take photos of the unscenicked pond after the bottom had been painted.
Dear Reader, this means that you will have to separate the two stages in your head when seeing the photos.
For the record, this was (mostly) done in August 2022 with finishing touches added in December.
Stage One - Painting the bottom
Fake water dries clear unless you tint it. Paint is needed to create the illusion of varying depth - the darker you go, the deeper the water. Paint also gives the impression of what kind of bottom - in learning about the water process, I saw videos where people lined the bottom of their water with sand and rock since they were modelling creeks.
I wanted a quiet pond. A quiet pond with some suggestion of belonging to a larger water structure (justifying the addition of some imported friends). So I went with a progressively darker bottom - dirty brown on the shore then progressing to a dark green in the center.
One of "mistakes" I thought I made was not making a flat bottom. Instead I used flexpaste to seal the bottom of the pond. This created some small ridges (you'll see them in the photos shortly) which I thought would take away from the idea of a soft mucky pond bottom.
While those fears proved over blown, I think I would have been better off using a bit of sand, especially in the shallow end.
 |
| The bottom |
Stage two - On the Shore

This photo shows the shore pretty much as it looked after the bottom was painted. I worked a bit of flexpaste in to smooth the transition between shore and pond.
Now...down to business...and layers.
Starting with a basic dirt base, I worked in a variety of materials and textures.
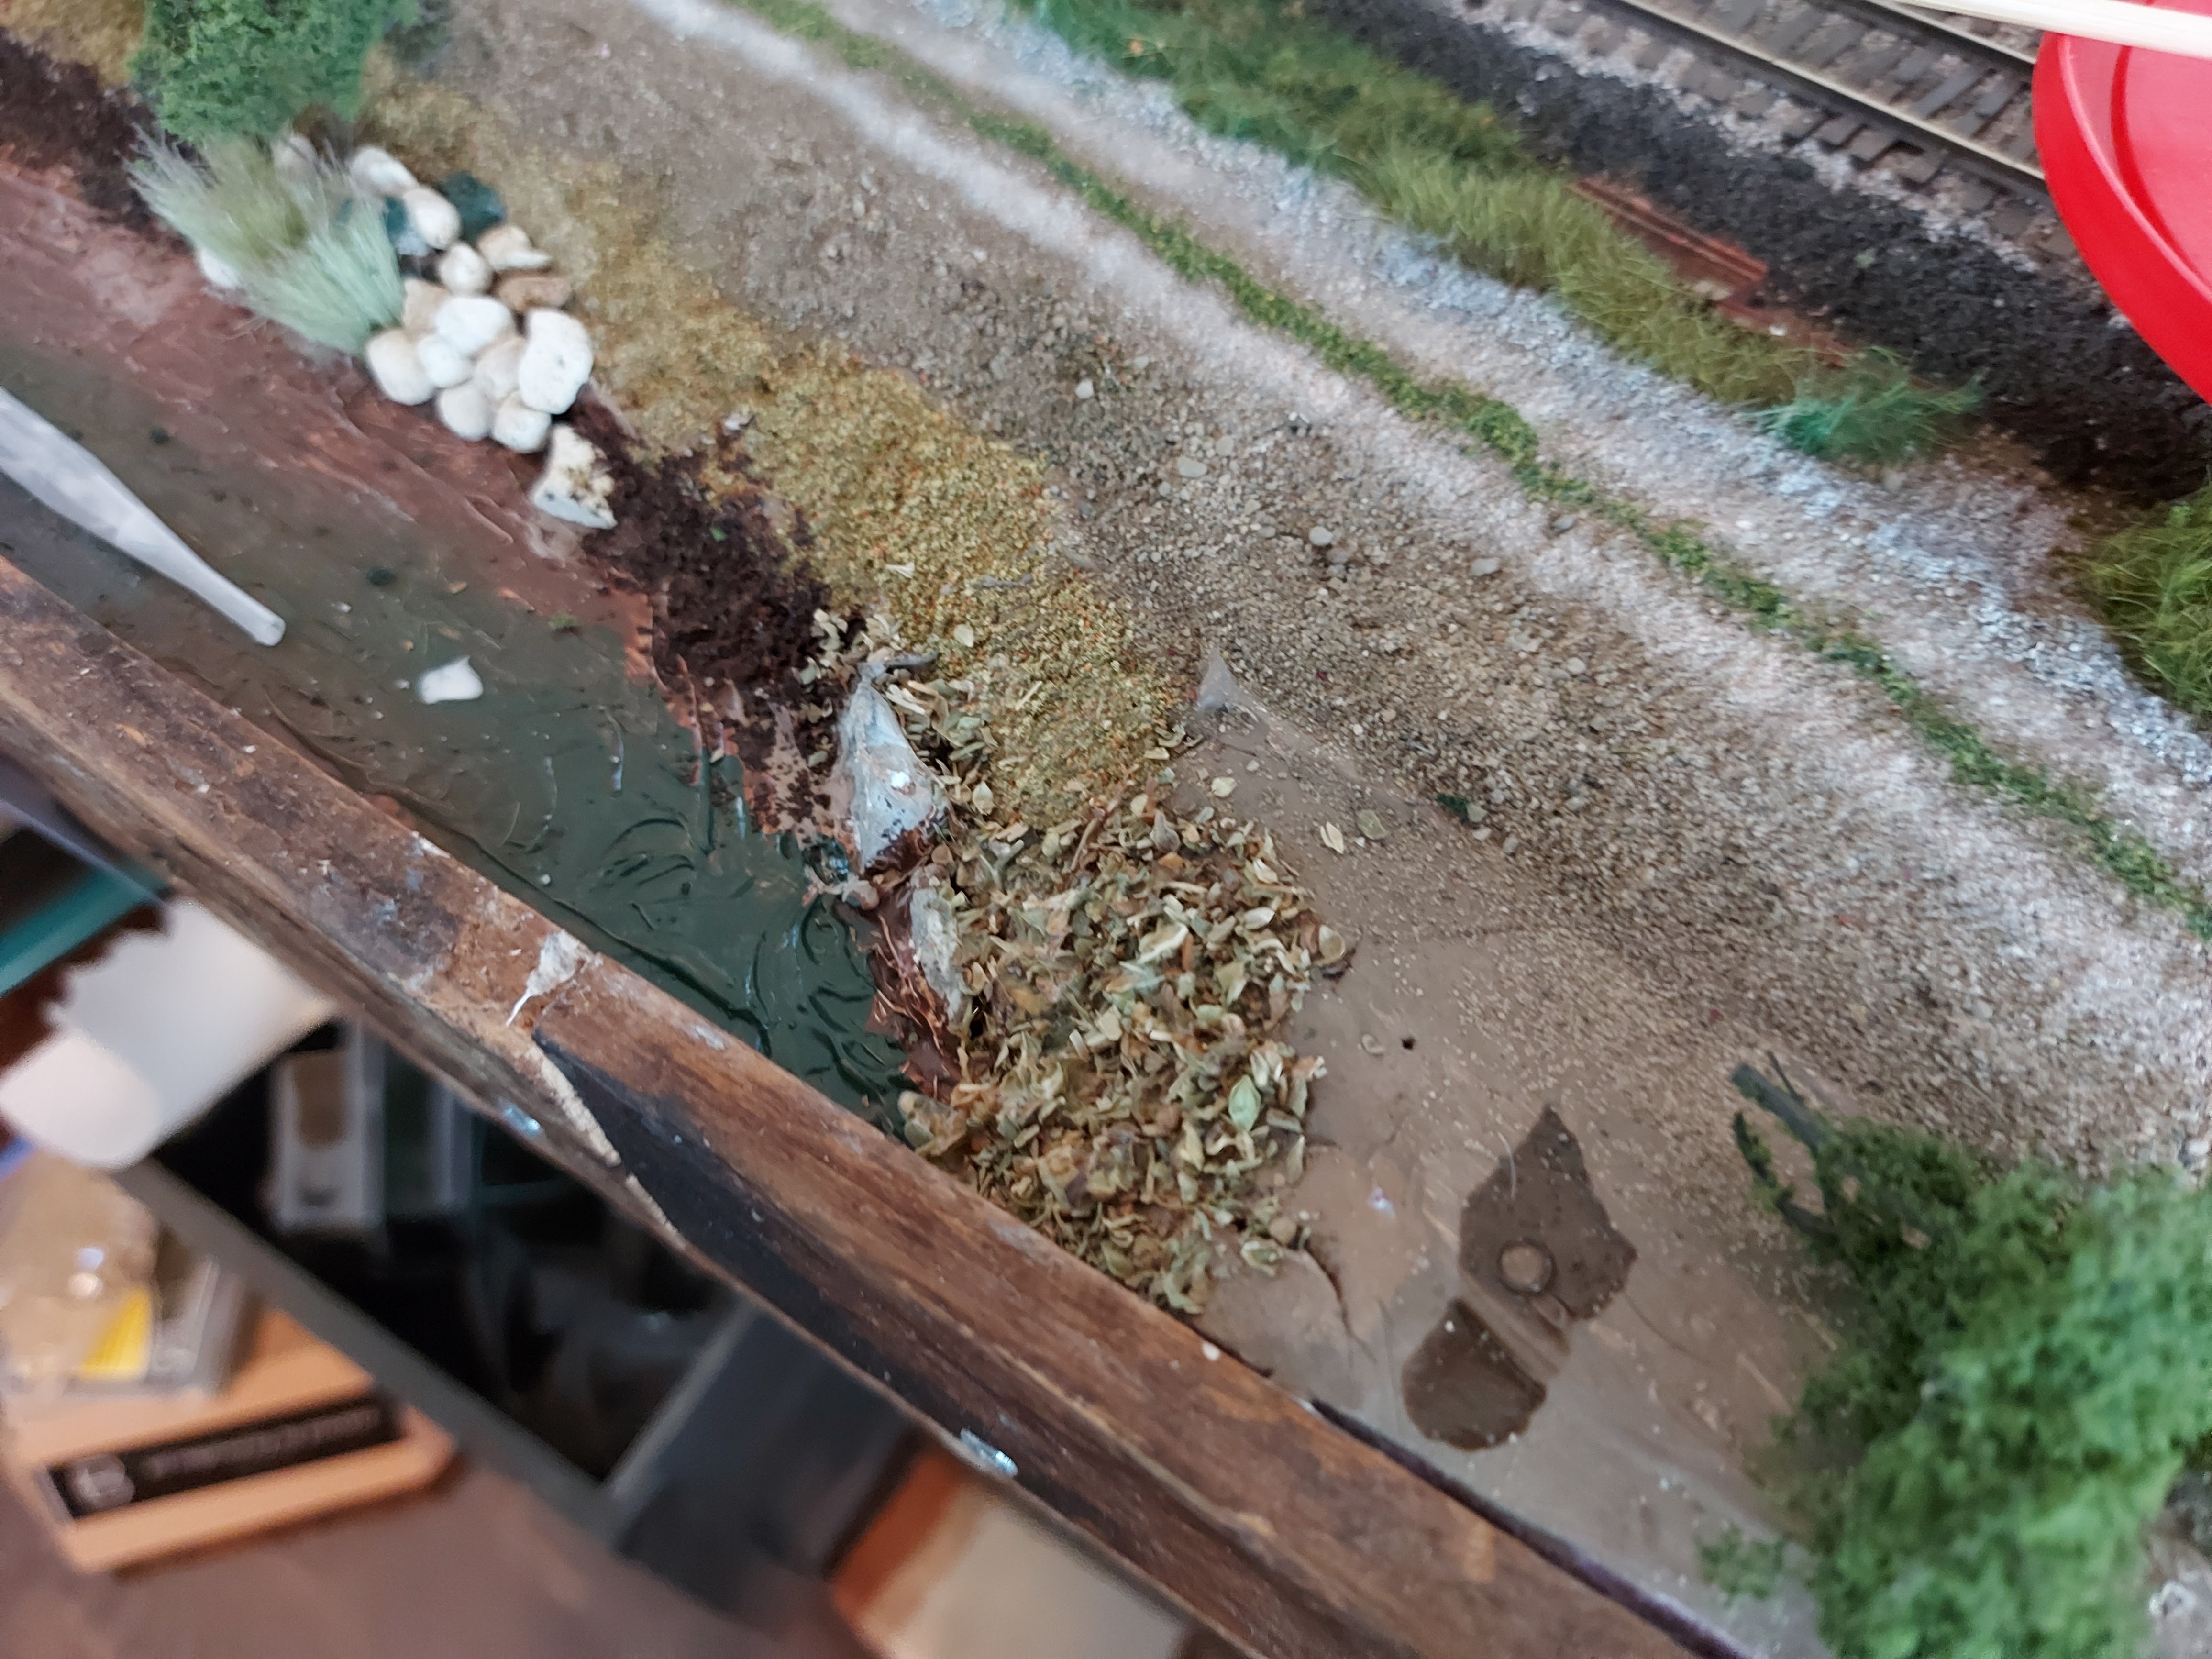

The above photo shows several of these textures. The dark brown is Earl Grey tea (!), the flakey pieces from a spice kit, the grey rock was a leftover from plaster casting, the (overly) white rocks from a closet freshener (!) and the cattails were purchased. I added some bramble (the small green shrub) from Woodland Scenics. Away from the shore, you see the base of dirt/brown ground foam bringing us to the road.

I added some small yellow-ish rocks to the shore (probably my least favourite part), more bramble/shrubs, sticks and some (commercial) brush. I created some separation between the driveway and the pond with relatively high grass.
Again, scenic theory:
1. Work in layers.
2. Use different textures/materials...
3. ...but keep the colours muted so nothing sticks out, and
4. add a bit of height with some shrubs, but not so much that it overwhelms the scene.
When done properly, you end up with scenery that looks compelling and natural. The grass between the track and the drive way is shorter than the grass between the more "remote" and less travelled area between drive way and pond. I created a few breaks in the grass to show where people might walk (at the switchpoint being the best example. If I was truly on my game, I would have added a small path to the pond for eager anglers...oh well.
Keep in mind, the depth of the scene is 6 inches from the barnboard to the track! But hopefully, the eye can't tell because of the composition and texture.
The additional complexity here is that I would be pouring the water last so I needed to ensure the "shore" was "flow friendly" for the latex - in other words, there weren't any bumps or obstacles to the flow of the latex.
Stage Three - Pouring the water
With scenery complete, I then bought caulk to seal the area between the "bottom" and the barn board framing. Of course I made this more complicated than it needed to be by not buying clear caulk the first place. After hastily cleaning up an initial seal using white caulk, I went back to Home Depot and looked more carefully at the tiny print.
Then I sealed...

And then I began pouring the water. For the first layer or two, I tinted the water, perhaps a little heavily, to get the "tea stained" look I wanted.
...oh s***! I forgot that there were holes in the barnboard...which became evident when the "water" oozed out of the holes. I managed to clean the mess off the floor in time, but the oozing meant that the water did not dry flat.
I used a lot of caulk repeatedly (see the photo below) and finally created the seal.
The saving grace is that the thin pours (I believe I did 4 or 5 in total) gave ample opportunity to pour into the gaps.

That was the hard part. Everything else was pretty easy. I had to work in the water around the cattails and over some rocks but my good planning meant the work ins were minimal. There weren't even many bubbles - not sure what to attribute that to, but perhaps the thin pours.
(I know the detail is a bit boring but this blog is partially intended to remind me of how I did things).
I will add more in a further post, but here is the end result (the first two were taken during the curing process):


In my next post, I'll write about some of the details added to the pond, some final touch ups...and finishing the layout...!!!


