Sunday, June 13, 2021

 Filing the Gap (III)

The last piece of the scene was a small gap between the tracks and the road.

If this was a well-travelled part of the world, there would be a nice, orderly "T" intersection instead of roads going off in four directions. But this was a back road to the station and a cold storage facility. Not exactly the "must see" part of town. 

Roads go as they go for a reason. And I didn't want an orderly road. So to excuse the disorder I created a small bluff. The bluff adds an additional visual layer between the tracks and the front part of the layout and the bluffs. More bluntly, the bluff acts as an "X" in the line of sight preventing a clear view of the back.

Pre-bluff

What's apparent in the above photo is the steep drop from the road to the base brown foam. The bluff would help to "mellow" and disguise the drop.

Again with the blobs...


I started with the tried and true method of building small blobs off layout using insulation foam. I also found a left over plaster rock to incorporate into the scene to add a little Canadian shield effect.


The blobs were painted brown and I covered them with understated ground foam as a base. This meant any scenery gaps wouldn't show through.

Basic model railroad scenery theory states, "Add scenery in layers".

Shrubs and the base ground scenery around the bluff came next:


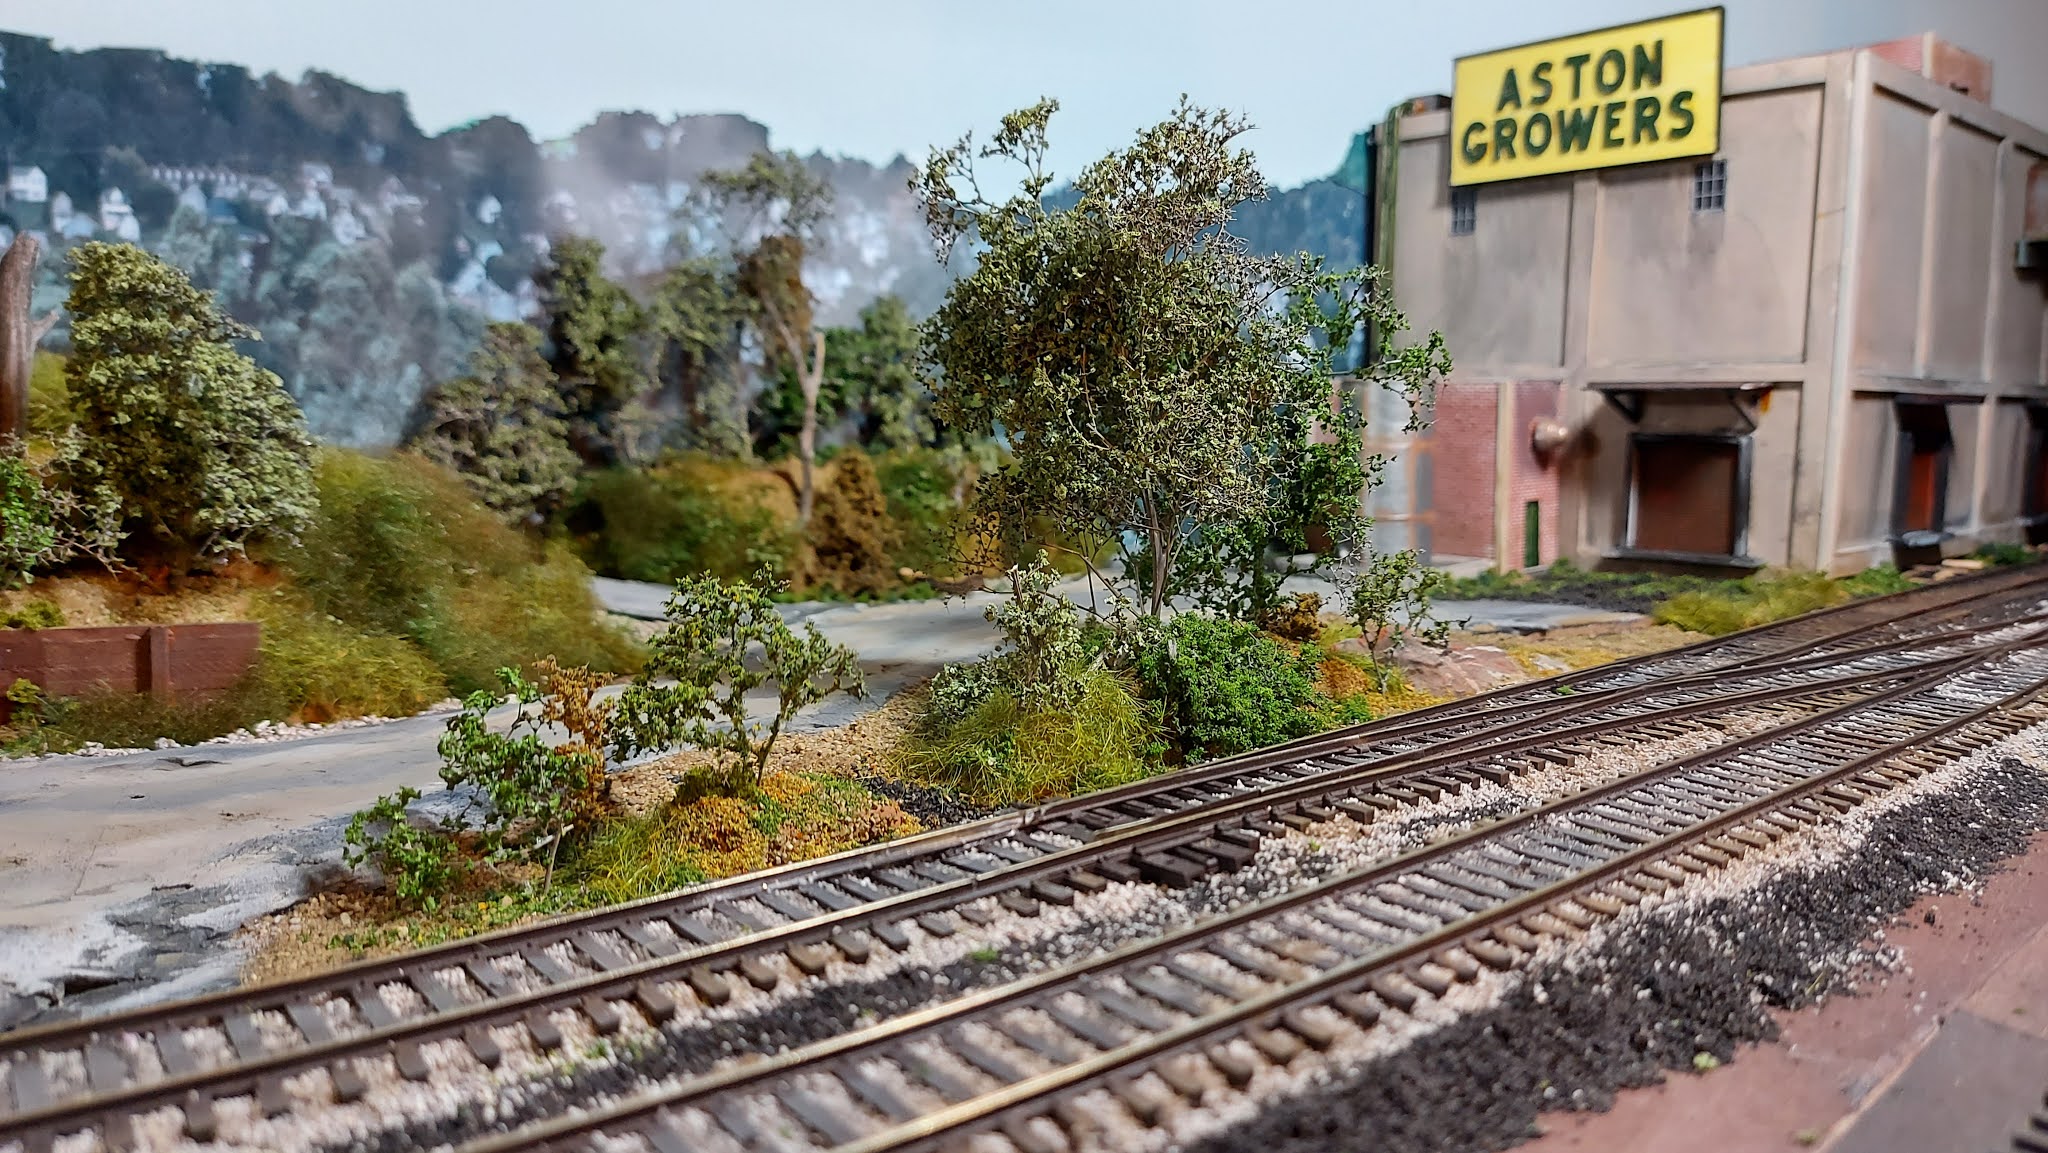
I tried to leave enough space between the tracks and the bluff, and again between the road and the bluff to give each element room to breathe. I also made sure that the area around the switch point (where the switch is turned) so that the imaginary train crew would have level ground to work with.

I was happy to see at this point that the drop off from the road was gone. The shrubs were a mixture of colours and Woodland scenics shrub and leftover Super Trees.

Speaking of which:


Note the black ballast around the switch.

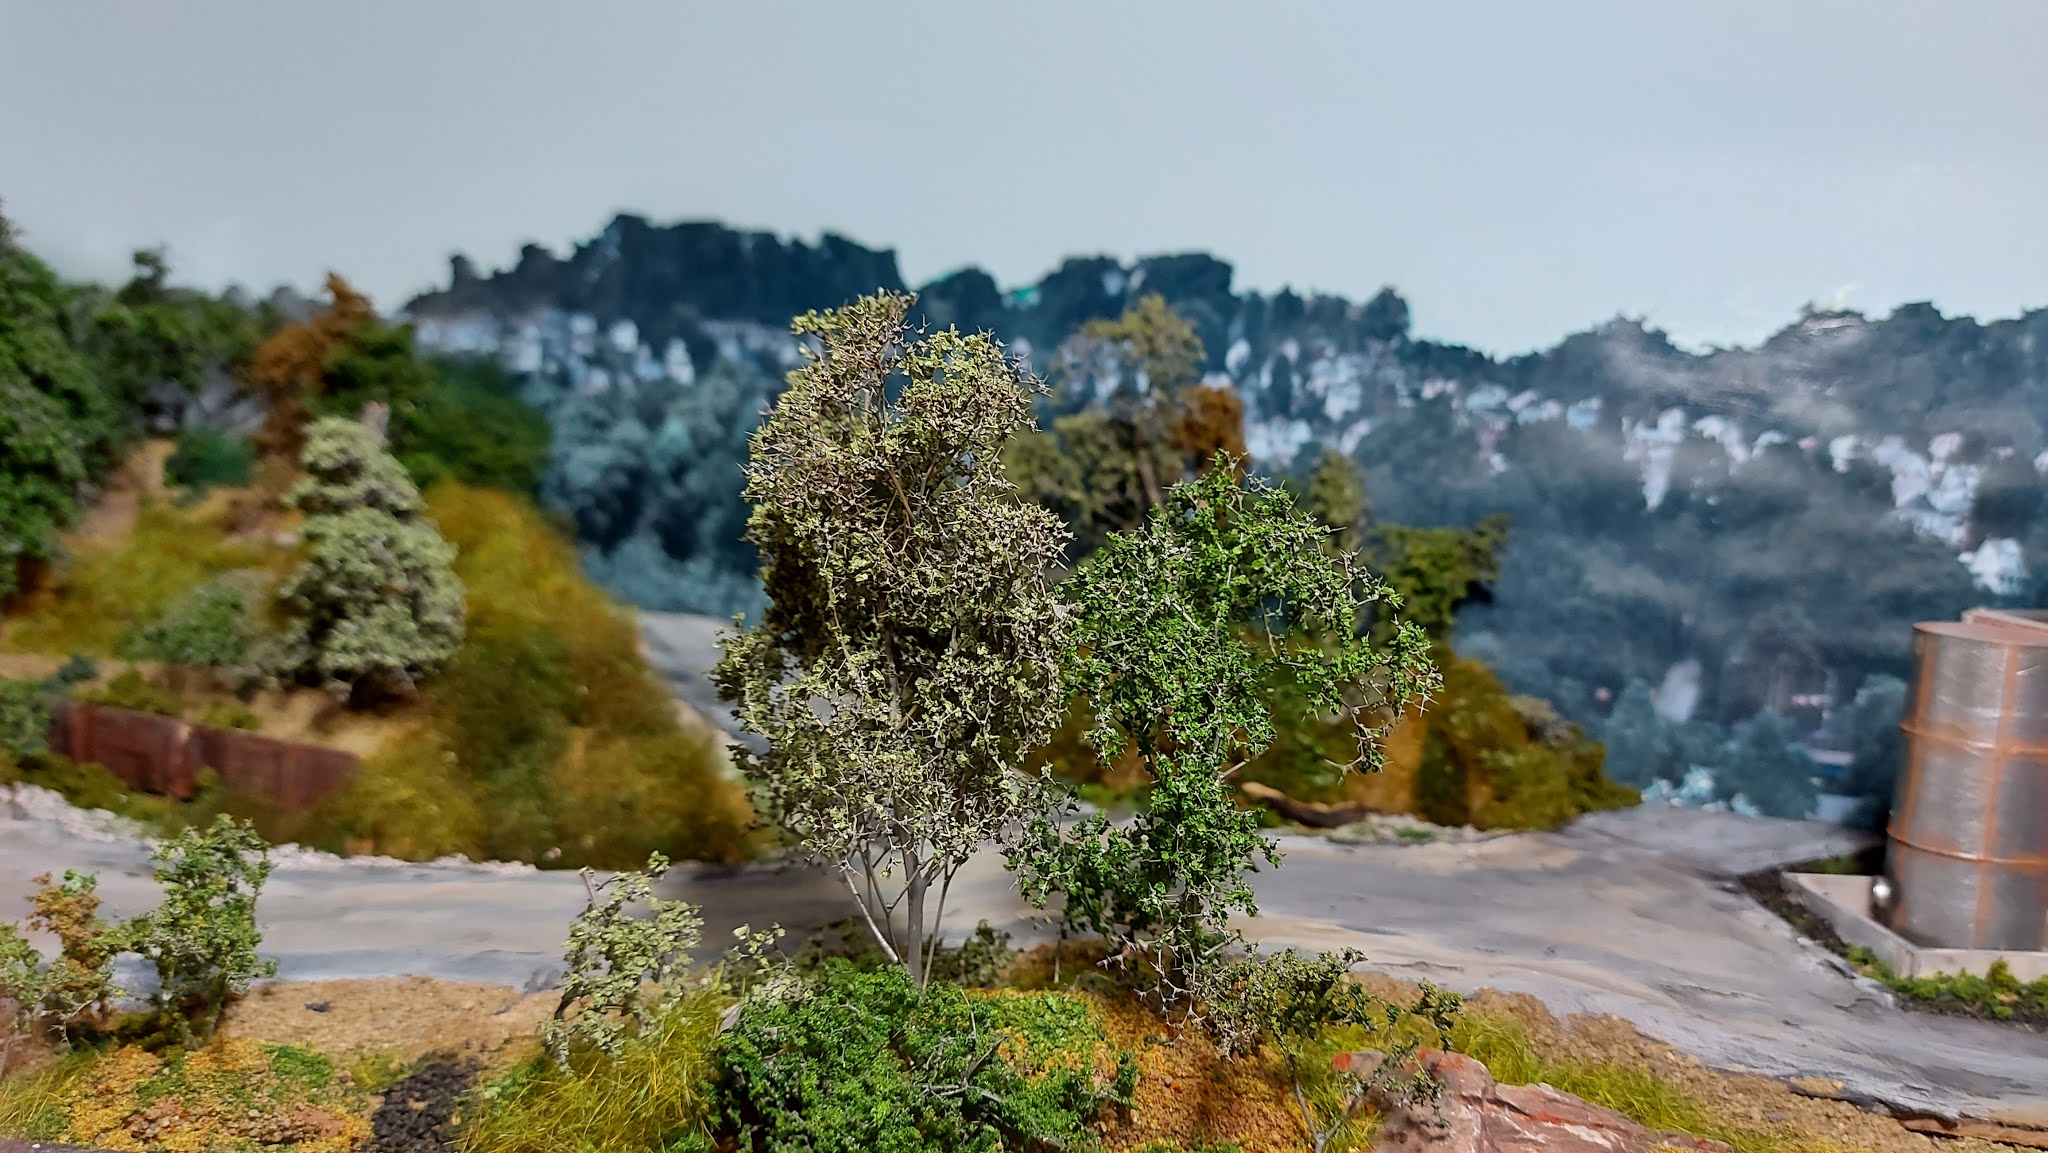
As I went along, I also re-weathered the road to add more dust/dirt using powder. I found it easier to blend the colours once I had added the surrounding scenery. A lesson for me. A lesson I had already learned from the bluff was that you only need a few trees to give the impression of density. In this case, two medium-sized trees create the effect. 

From the side:


I think all these photos illustrate the "X" concept. The bluff does a good job of breaking or distracting the line of sight, keeping the eyes from going directly to the backdrop or building.

One last note before I close the post. Summer time is not exactly layout time. But it is a good time for driving. 

When I built Aston Growers, I used other HO scale models as a reference point. At the time, I looked around for a real-life example and couldn't find anything online.

And then, a few weeks ago, about five miles from where I live, beside the CPR tracks, I found Dixie Growers Ltd.:


Love the brick elevator shaft and the office section too.


...and


Aside from the weathering, I'd say 👍.


Monday, May 24, 2021

 Intermission


I'll take a short break from the filling the gap story to talk about the overall progress of the layout vs this blog.

I have one more post to go on "Filling the Gap". With that post done, the story will be current, more or less. I will have covered every completed section of the Aston Spur.

I am working on a new section at the front left edge of the layout. It is going well, albeit at the usual slow pace. There have been many some details to create, paint and prepare for a placement (watch out for an upcoming picture of my first "hero tree"). 

Once that is out of the way, I'll have covered about 80% of the layout and have pretty much plotted out the remaining bits. I think I need a swamp and there is just enough space for one.

Of course, there are more details to add and finishing touches to touch, which will take a while. Road signs, station signs, roof details, the "vignettes" I talked about in an earlier post, etc. etc. But the completion of base scenery (which will take several more months) will be a milestone.

This all means the pace of posts has slowed. 

I attach though a preview of some of the latest work. A small hill leading to a building under construction. I also took some time to weather my ONR boxcar to make it less shiny. Burnt Sienna looks nice on a boxcar is my weekend discovery:

Under construction.


Sunday, May 16, 2021

 Filling the Gap (Part II)

With the road to the backdrop installed, the next phase was to rough out the lower level roads. There were three to lay out:

1.    The road to the station.
2.    The road to the (non-visible) part of AG.
3.    A short stub to the "local delivery/pick-up" loading dock beside the tracks.


I used the MDF board as the base. As we will see shortly, this was a mistake. I should have used Smooth-it in between a wood frame (acting as a dyke to keep the Smooth-it from running amok), but what can I say...lessons learned.

Another photo:


The problem with plaster/Smooth-it is keeping it away from surfaces that you want pristine. Like the backdrop (see the left above). For a short stub coming from the backdrop, I used sandpaper, painted and chalked (with powder), for the surface. This method also allowed me to play with the angle I wanted the road to hit the backdrop at. 

One more photo:


Once I was happy with the basic layout, I began to plaster.

This is where I discovered the folly of not using wood to "frame" the road. With no frame to run my leveller (a crepe press) along, I got a very uneven and patchy road. I added black paint at this point which hilighted how rough the road was:

Look at the new blob!

Adding a bluff

Annoyed, I left the road as is for a while. In any event, I had scenery to put in behind the road, and generally you finish scenery from back to front.

I left some space against the backdrop to add a small, tree-covered bluff. This complemented the downward grade of the road and, to my mind, took the eye off the road.

I built the bluff with my favourite "blob" method. Pink insulation board, shaped with the hotwire and painted. Building blobs off layout is particularly helpful where the hill is steep. It is much easier to add ground cover with the blob laying on its back.

I add ground cover, Heki grass, some trees and yet another dead tree (again justifying the $9 purchase of twigs). The result, once installed, was great.


Note the "sandpaper" road to the right.

I was very happy with the blob. It looks like classic near north Ontario scrub. The bluff also smooths the transition from Station hill, the road and the flat land where AG is.

Back on the road

But that road...ugh.

I attacked the road with thinned paints to dull the black, followed by weathering powder.


Still pretty rough...


Still pretty...ugh!

Roads vary in colour and the difference is most pronounced between where the rubber hits the road and elsewhere. Hence the darker tracks that approximate where the tires do their work.


To make a long story short, I did a lot of sanding and re-colouring until I felt the road looked passable. All of which could have been avoided if I had kept to my original wood-framing road construction method.

Careful eyes will note the very out-of-period traffic lights that are visible on the backdrop. You can't plan for everything! 

I'm still not done with this part of the layout. In part three, I'll talk about completing the short stub to AG and adding the hillock.

Sunday, May 9, 2021

 Filling the Gap (part I)

After finishing (mostly) the AG/GC complex, the last piece of unfinished terrain was the area between Aston station and Aston Growers.


The above picture shows the gap in the early stages.

Closing the gap was a five-part process. Five parts in what was less than a 2 foot square area!

1. Build a road disappearing into the backdrop (see the black strip) to link this area with the outside world and connect (out of sight) with the main road running along the backdrop.

2. Connect that road with the station road (to the left above), the road to the (unseen) truck loading area of AG - the upper right and a short stub to the modelled truck loading dock at AG (the lower right).

3. Build a small bluff (upper centre).

4. Finish "Station Hill" so that it descended down to the road.

5. Construct a small hillock beside the tracks to camouflage the intersection (middle of the photo).

The road to town

Easily the most challenging bit was to build a road those rose from ground level to disappear into the backdrop at an angle. I'm no geometry whiz. The road needed to blend into the big hill behind the station and the later constructed bluff while coming down at a reasonable angle. It also had to meet the backdrop at a angle. Finally, the right side of the road also needed a shoulder. This got complicated because the backdrop and later constructed bluff left little room. It was a puzzle. 

I used styrene as a base with 320 grit sandpaper on top. I left part of the styrene uncovered for rock ballast (shoulder) to be added later. To give the crest of the road some flex, I cut the supporting styrene and narrowed the end of the road going into the backdrop. Again, this creates the illusion of the road disappearing. I weathered the sandpaper and added my shoulder. I also added a wood "lip" at the bottom of the road to match the height of the road that would be added later. This gets tricky because I would be using plaster Smoothit and did not want to sully the sandpaper road with plaster.


But to blend the road in, I needed to finish the hill behind the station. 

Station Hill

I have really come to love pink insulation board as a scenery base. It is firm but easy to cut and counter. Once you add paint, it will absorb ground foam and it is soft but still a good base to plant trees in.

I did not entirely finish Station Hill the first time round. I knew I'd be finishing the hill later so I left room for more trees and roughage.

More SuperTrees, some Woodland Scenics bramble, Heki grass, and some puff balls added greenery:


As I mentioned in an earlier post, the greenery options have come a long way in 25 years and the major challenge these days is not over doing it!


I have particularly fond memories of building the retaining wall on a cold December morning while I listened to a 1978 broadcast of a Kings/Canadiens hockey game. I wasn't able to match the colour of the previous wall but I can't say it is noticeable amidst all the bramble.

The other note about this part of the construction is the dead tree trunk you see in the above photo. I was at a train show a few years ago and spent about $10 on "Woodland Scenics Dead Wood". At first I thought this was the most ridiculous purchase - I was buying stuff I could get for free by crossing the street and going to High Park. But I really like how the trunks are weathered (you'll see more of them shortly), and what I was really spending $10 on was confidence - i.e. that they'd play their role well on the layout (as dead tree trunks).


At some point, construction got to the stage where I could install the road knowing it would blend into the hill once greenery was added. That was a huge moment of relief.

And the same for where Station Hill would eventually meet the flat road behind the station. I roughed in the scenery at the "meeting point" but left enough unfinished that blending could be done at a later date.

In part II, I'll discuss the bluff, the road network and the hillock.

Sunday, April 25, 2021

 Aston Growers (Part II)

Prior to "planting" Aston Growers, I had a few additional touches to add.

The first was the sign.


The back of the sign is styrene, painted a faded yellow and trimmed with wood painted black as a frame. The trim was a small touch but I adds some depth to what is otherwise flat styrene.

The letters are from a Blair Line kit. They are wood cutouts. I did my best to evenly space the letters and keep them aligned. The end result isn't perfect (the sign droops slightly to one side) but close enough. I added some support ribs for the sign, but they aren't particularly visible.

Roof touches

A multi-level cold storage building needs at least two things on the roof:

1. A headhouse for a freight elevator.
2. A refrigeration unit.

Using the same techniques used on the outbuilding, I constructed a small brick structure for the roof. I reason that the building contains the elevator mechanism. It breaks up what would otherwise be a flat roof.

As you can see from the photo below, I have something that looks like a refrigeration unit (the grey thing above the "TON" in Aston). I can't say I love how it looks so I haven't glued the unit in place.


For the roof, I wanted a contrast with the Generic Canneries roof which is covered in drainage ballast. Aston Growers has a flat black roof made out of thin styrene. Unlike the foamcore board used for GC, styrene doesn't warp so this roof should remain level.

Additionally, I added an L-shaped styrene rib at the back of the structure to blend the roof into the backdrop (more on the backdrop in a second). I'd like to think that this touch makes it hard for the eye to determine where the roof ends. The other advantage of the L-rib was that it covers any gap between the underlying roof and the backdrop. This is important considering the difficulty in getting a flush fit with the roof and the backdrop.

Blending the roof in.

I also cut some green photo backdrop and added behind the building to prevent the black roof from meeting a pale blue sky.

Finally, I put some pipes on the left hand side of the building from the brick outbuilding up to some roof unit to hide where the grey building side meets the green photo backdrop.

All these small touches took time. And as a chronic box-checker, it is annoying to have all kinds of extra steps get in the way of a big box checked, but, as the photo below shows, mission accomplished. Yes, you can see a bit of a gap between the building and the backdrop but there is enough other visuals going on to make you not care (but oh that yellow door and window on the depot!).

Looks railroad-y!


The walkway

Finally we get to the point of the whole Generic Canneries/Aston Growers exercise. Which was to have a walkway connecting the two buildings.  

The inspiration for the walkway is from a layout by a guy named Paul Dolkos. Of course, I can't find photos of the scene that inspired me, but the point was that he modelled a paper mill complex and put a walkway spanning the tracks between the buildings. The practical point of the walkway was to hide the track disappearing into the backdrop. I had a similar problem - my track comes to an abrupt end between the buildings.

This is where it all ends...

As much as I loved my idea, implementing it was not easy. I had to account for the walkway when putting both buildings together. At least the walkway's meet-up with Generic Canneries wasn't visible, making my task easier (it can be purely functional).

I constructed the walkway out of Evergreen siding, left over window castings and the roof (also out of Evergreen siding). I wanted the sheet metal to look a well aged and rough around the ages. This is an industrial complex, after all. I perhaps got a little carried away the rust affect, but it is hard to see since this isn't a well-lit part of the layout.

Aid from a red cup

I did a test fitting, a few adjustments and then set about to levelling the walkway.


The last piece was that I felt the walkway was long enough that it needed a support. By this point, I had used up my store of luck. The buildings fit. No obvious mistakes or gaps. Yes, a few droops here and there (the Aston Growers sign, the unloading shed). Aston Growers looked good against the backdrop. Enough clearance for boxcars going into Generic Canneries.

All very good, except, as you can see above, the thin support beam is uneven. Sigh. Good luck seeing it though...

Postscript

After writing about "Modeller's block" last time, this weekend (last April weekend) has been productive on the model railroading front. As I write this (Saturday at 3 p.m.) I've begun the first layer of scenery for the foreground yellow blobs I wrote about last time. And as I edit this post (8:45 p.m. on Sunday) I can report that I spent several hours on the first pass of what is now a brambly blob. Very time consuming, but fun.


Sunday, April 18, 2021

Modeller's Block 

Before getting back to the saga of Aston Growers, I thought I would write about my current challenge - modeller's block. 

To me, model railroading is storytelling. I think most people who think of model trains think about a train running in a circle (probably with a steam engine on the front and a caboose at the back), perhaps around a Christmas tree.

For me, model railroading is about the industry and the community it lives in. I work for a railroad (not the railroad part though) and I've been in the logistics industry since 2004. The reason I got into the industry is that when I was a baby lawyer in 2003, my firm had a warehousing client in Cornwall, Ontario. The client had a wrongful dismissal court case that needed defending. To you, that may not seem very interesting. But it was fascinating to me because it meant I could take the train to Cornwall. I would get paid to take the train! Anyway, that turned into a job and let to my chosen industry. 

To me, that is an interesting story.

Modelling allows you to tell stories. A great example appears in Sam Posey's book "Playing with Trains". Posey was building a layout based on a long-dead Colorado mining railroad. In real life, Posey was a race car driver and he knew Paul Newman (a big fan of auto racing). At the time, Newman had a charitable endeavour, "Newman's Own" that made high-end food condiments such as salad dressing. The charity part of it was that the company donated its profits to well-deserving causes, like the environment.

Posey (not a big prototype modeller) decided to add "Newman's Own" as an industry on his layout. He wrote that because "Newman's Own" was so virtuous in real life, he would make it a very, very bad company on his layout. He modelled the industry as a rundown, rat-infested building. He placed the industry next to a stream and had a large discharge pipe going from the industry to the stream, spewing out toxic runoff. He added some drunk employees, loafing off away from the eyes of the supervisor. I have no idea if Paul Newman ever saw the layout, but who cares - I'm sure Posey had endless joy translating his idea into HO scale.

I'm at the stage where I've modelled the main stories on my layout. The industries. The track. The winding road along the back. The station. My current block is that there are four areas where I know the story I want to tell, but I just don't know how to translate each story into physical reality. This post is about the stories from smallest to largest.

Story One - A picnic table for Aston Growers

There is a small bare patch of scenery adjacent to AG and beside the tracks:


I hope that is enough room for a picnic table for the AG boys.  This should be an easy project - picnic tables and figures are easy to find.

Story Two - A truck repair scene for Aston station

I have posted about the western end of Aston Station where I've located buildings for the track gang. I've posted about the station itself. I haven't described the scenery between the station and Aston Growers - that is a future post.

What I have right now is empty pavement on the eastern edge of the station. As I'll write about in a future post, I didn't do a good job laying down the road, and it is rather bumpy and uneven. Actually, the bumpy and uneven road will probably blow a lot of truck tires...


...so the idea here is to take a short truck trailer, add some men and junk and tell the story of a small running repair. Nothing overwhelming, but enough to distract from the bumpy road.

This will be a harder scene to put together since I have to find a suitable trailer, build a tire jack and locate a repair vehicle. There has to be enough detail to tell the story, and finding that detail in HO scale is often the source of delay.

Story Three - the back lot of Generic Canneries

I have mentioned this before but there is a decent sized backlot at Generic Canneries (understanding that the model depicts the back of the building, not the public-facing front). 


The detail challenge here is that my ideal scene has a few Generic Canneries truck trailers waiting for their next load. So I'll need to design a paint scheme and find some way to decal the trucks. Not fun but it would be very rewarding if I could pull it off.

I already have a nice shack ready for the trailer boys to hang out in while they await instructions. I'll add a rusted out truck to tell the story of an evolving truck fleet and add assorted other junk. The result will be that Generic Canneries is a busy place with a lot of freight on the go.

The other block on this scene for me is fencing. As noted in an earlier post, Generic Canneries already had a problem with some nosy kids (one of the above photos suggests they may be back). So GC should really fence that yard in.

The drawbacks to a fence are:

1. A fence will block the eye-level view of the main track. I have intentionally put the track going into the GC building at foam level to give some variety to track height. 

2. Fences are finicky to install and break easily. This is especially a concern because they will be near the edge of the layout.

3. Fencing off the yard will require me to build gates for the tracks. And I have tracks at two different elevations which will complicate gate installation.

Two ideas to get around this - 1. Fence off only the track closest to the edge of the layout to suggest that GC owns all the land that the spur tracks run on. 2. Because the spur to the loading shed is new, I could try to model a fence under construction.

Of the four scenes, this is the one I'd really like to make progress on. If I scenic the yard, I'll have a section of the layout fully scenicked from front to back. At present, when I take pictures in this area, I am distracted by the brown paint and unballasted track.

Story Four - the foreground at the western edge

There is a piece of straight track at the bottom left of the layout that serves as a switching lead for the runaround track. Without this track, switching would be impossible because the engine couldn't "run around" its train - hence the term. But the track is straight which makes it boring.

I've built some nice scenery behind the track - the rock face - so I don't want that to disappear.

So I have created a two-part scenery blob that is ready for its story:


So far, the story is that of an overgrown driveway leading up to a small clearing. The driveway begins where the "blog" descends to the base (toward the middle of the layout). I terraformed the foam to create a gradual incline with small slopes on either side of where the driveway will go. Eventually, I'll add a dirt road to the middle forefront of the layout - giving the driveway a connection to the rest of the world.

My "block" is a vision of what is at the top of a small hill. I know it is the suggestion of a small building. I thought about modelling a concrete base and nothing more. The challenge is that the footprint is pretty small - at best 5 inches wide - and I do not want to overwhelm the footprint with a large building. I want something unobtrusive, but still want to hint enough that something was there previously. I'll then add long grass and plenty of scrub to depict and overgrown clearing. 

The hill isn't high enough to block the view of a train behind it, but I'd like to think that it will create the illusion of the track "passing through" the world instead of being the focus.

Postscript

So what is the cure to Modeller's Block? Time - first of all. With mindfulness of what you want, time gives you the opportunities to see things that help fill the gaps in the story.

The second thing is retail therapy. I placed an order today with my pals at Model Tech Studio and an assortment of junk (picnic tables, outhouses, stone walls, etc.) is on its way northward. Do I realize need the junk? I don't know. But it does take away the "I don't have the right stuff" excuse.

Finally, reader's may note that I began this post with a fun story about Newman's Own. The four stories I plan to tell are nowhere near as fun. I've fought the urge to add a moonshine still to overgrown hill scene. People will sit at the picnic table - not skunks (again, very tempted by this idea). The GC yard will be all business. The reason for all this is that for me, I'm more interesting in modelling things as they appear in real life instead of the quirky...


Wednesday, April 7, 2021

Aston Growers (part I)

Generic Canneries needed a buddy (and a supplier). What do you can? Peaches, potatoes, corn, peas. And it isn't too much of a product stretch to make applesauce and baby food.

Plus, I needed a place to spot those gorgeous 8-hatch reefers I talked about in a post a while back. 

So the answer was a produce storage facility across the tracks. And connected by a walkway to move produce from storage to canning. Conveniently, the walkway would also frame the view of the tracks and distract from the 90 degree corner.

Walthers offers a cold storage model.


While the model looks nice, I had a few concerns:

1. I needed a model to fit in the odd shape between the tracks, the back wall and the side wall.

2. The model didn't have a lot of character.

3. I had just come through the aggravation of cutting and splicing an existing model.

And besides, the Aston spur is designed to teach me new things. Having constructed the unloading shed out of raw plastic/styrene, I was ready for a larger challenge. So I took the "look" of the Walthers model and bought a bunch of white styrene from Credit Valley. Think of it like building a shed from lumber using a mix of 2x4's and plywood. 

I measured and measured. I cut some MDF (described as cardboard with an attitude problem by other modellers) as my base. It also gave me a footprint for the model so I could be sure of fit.

And then I started cutting the styrene and adding layers. I spray painted a tan base for the styrene and coloured with grey, concrete and a little brown.

Bare concrete wall

To decrease my aggravation level, I decided to add doors on top of the styrene instead of cutting holes. I added styrene strip on top of the base wall to give the structure some form and for visual interest. I added the doors (from the Roberts printing kit) and framed them with timber and a small loading dock.

It fits!

I was very happy when the test fitting showed the structure would sit nicely in its spot.

I continued by adding the front wall:


The front wall got two small windows - again for visual interest. Cold storage buildings (and I've been through several in real life) don't have a lot of windows because the aim is to keep the building cold. Pretty obvious eh? But I figured a little light for the workers wouldn't hurt.

I added a truck dock for local pickups/deliveries. I figured the main truck loading docks would be on the other (unseen) side.

As I continued, I noticed that the great thing about styrene is how well it fits together if you are mindful of math. For example, the main wall is slightly thicker than the side walls. I left an overhang on the main wall so the side walls would "slot in" and then added strip to create square corners that were sturdy. (Recall the small pull aparts when the walls met at Generic Canneries).

Details

Although I was really happy with how I was turning styrene into poured concrete, I thought the boys at Aston Growers would want to get out of the cold. One thing I didn't like about the Walthers kit was the all-concrete look. And I was ready to try again to get the brick look.

So I added a small entrance building in brick. Also, to disguise the lack of refrigeration equipment on the roof, I also added a head building on the roof.

And I had a slightly rusty tank that needed a home. 

A final consideration is that the front wall came out at an angle from the backdrop and I thought adding a out building would disguise where the building meets the backdrop.

Outbuilding and tank

I constructed the brick outbuilding using styrene as the core with thin brick sheet as the exterior. The corners were not very neat so I added some l-girder, painted grey, to cover up the corners. To paint the brick, I tried a new product - mortar paste. The paste goes on after you paint the brick. You let it soak in and then wipe it off with a cloth. The effect is much better than my previous method. 

I added a window, a door, a few vents/fans and a roof. I had to notch the structure a little for it to fit between the base and the middle rib of the structure.

I built a faux concrete dam for the storage tank and installed the tank in front of the outbuilding. I hope the shiny tank draws the eye away from where the structure meets the wall.

I then went back and added small eaves to the loading docks.


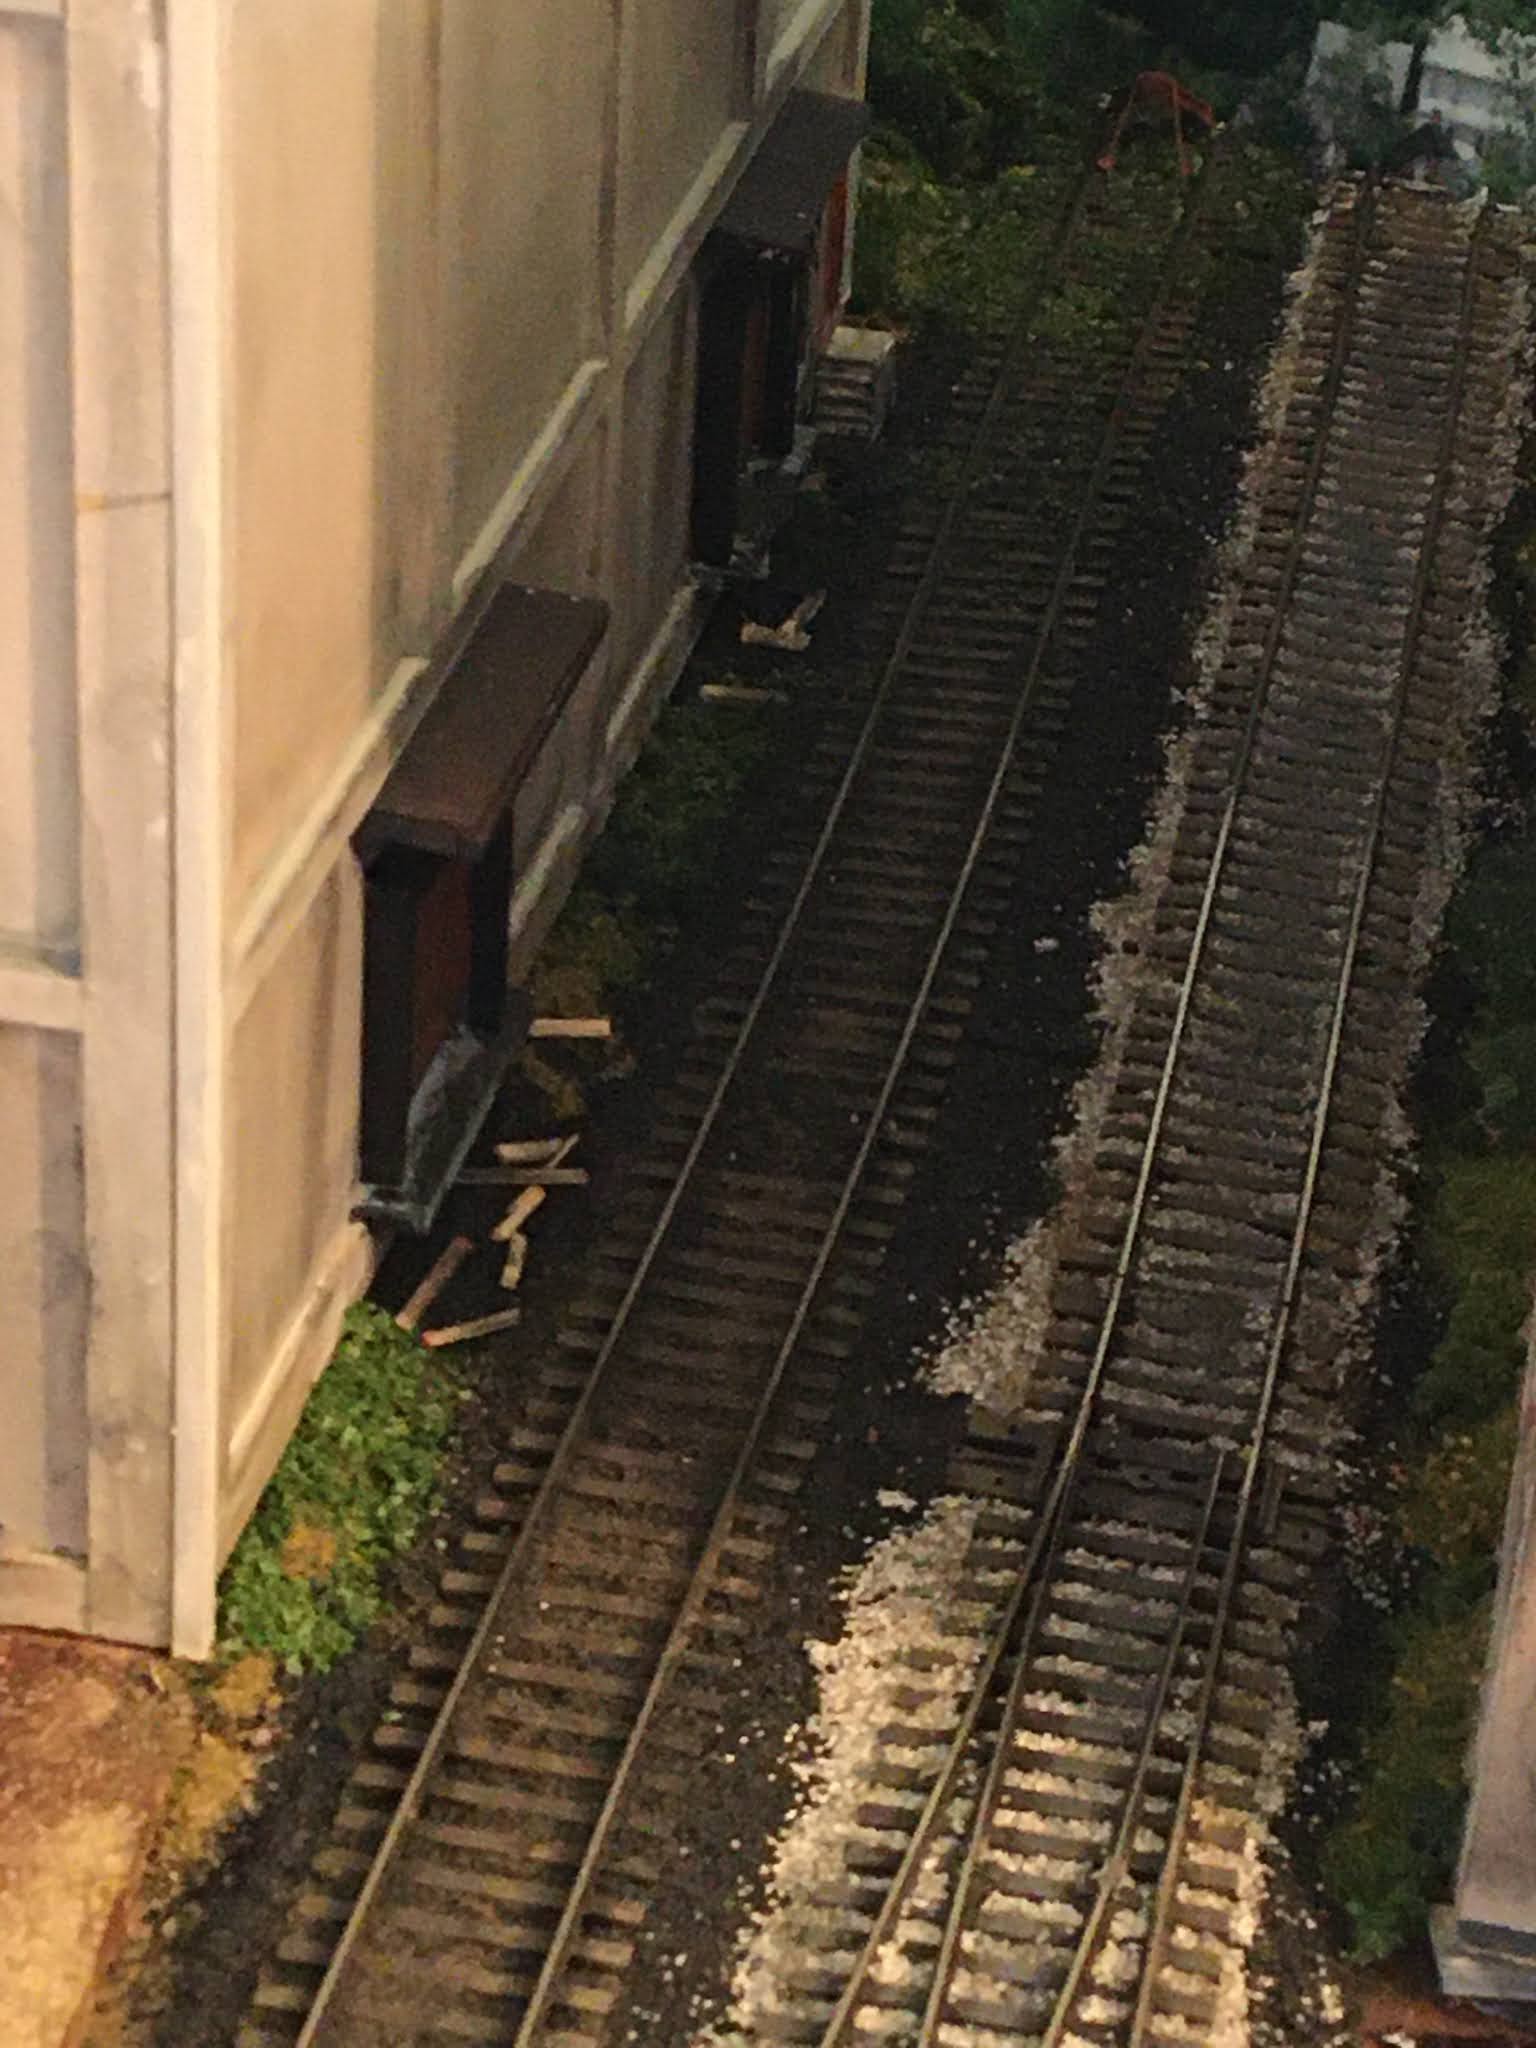
There will be a part two to this post, but I wanted to share the above photo showing a close-up of the corner of the structure after I added scenery to the side. You can see the small bits of wood strewn beneath the loading dock (broken pallets and boxes) and weeds. And the photo below:


Being a local facility, I figured that Aston Growers would not inbound much  produce (AG being very keen on "eat local") and would generate few outbound loads so only one of the two rail loading docks would see much use. So I added less scrap wood at the far dock. The track also gets weedier as it heads toward the backdrop. (Note the stairs from the door - those took me about an hour to make and paint!).

The project was both fun and time-consuming. The advantage of scratch building (i.e. making a cake without mix) is that you can make things to be exactly what you want. It is also surprisingly easy to make a basic structure that looks as good as an off the shelf model. The trade-off is that building everything from scratch takes more time than building a model kit. You also have to supply your own details. I find the smaller the detail, the more time it takes to create. Those loading dock posts (in black above)? They took hours because I had to find the right wood, cut to size, trim the door, paint the door, paint the wood, add the base, glue everything together, touch up paint, weather, etc. And I still don't think they look great (too big).

Part II will follow shortly.